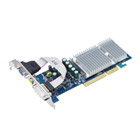
Specialist companies relish the opportunity to earn a bit of easy money from performing 10-minute fixes. Such is the demand for graphic cards and
memory that businesses can make a killing off consumers unwilling to
carrying out the installation themselves. The truth is, you can find out
most what you need to know through a simple online search and
step-by-step guides like the one below.
So, if you’re a PC gamer and need a hand introducing your new graphics card to the system, observe the following points.
Un-install drivers
First off you’ll want to disable your old graphics card before
inserting the new one. Failing to do this will see your computer trying
to trace the previous chip when the new one has been inserted into the
motherboard. So, after right-clicking on ’My Computer’, click on
the ’properties’ button before finding ‘Device Manager’ located within
the ‘hardware’ tab. Your current card will be found under the ’Display
Adapter’ button so, after you’ve accessed the option, click the name of
the card to view its properties, before un-installing it. The removal
process should take around five minutes.
Remove
 After your card has been fully un-installed, a notification should
appear confirming this. Upon viewing the message, shut down and turn
your machine off at the mains. Open the back of your computer up and
search for the AGP slot, usually found directly above three thin, white
PCI drives. It’s worth mentioning that all machines are different, so it
might be worth scouring forums or having a quick look through the
manual that came with your PC. After equipping yourself with an anti
static glove or wristband - to eliminate the risk of you picking up
a shock - go about unscrewing the plate guarding the drive and removing
the old card.
Insert
The easiest step of the lot comes next. Simply unpackage your new
card and slot it into the AGP slot, making sure it’s fully inserted.
Close up the case, then switch your computer back on.
Install
Installing your new card is a little different to un-installing, but
it’s just as easy. XP and newer versions of Windows should ask you
whether you want to install the new card, but if this isn’t the case, go
straight to the ‘Control Panel’. The ‘Add Hardware’ button should be
located in the list of buttons; clicking on this will prompt an
installation wizard to pop-up and ask you to insert the relevant CDs
that came with your card.
After this has been completed, restart your computer and prepare to game on another level.
(Source)


No comments:
Post a Comment